

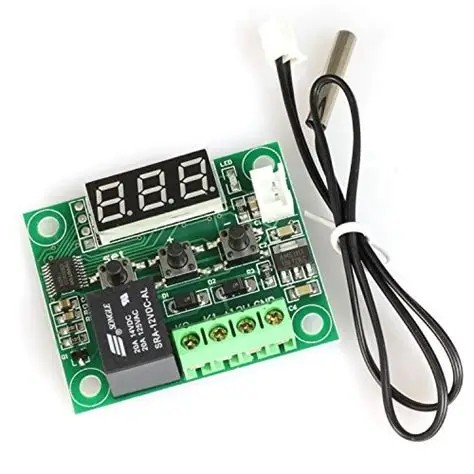
Description
How To Use:
- Connect the power supply and the load, you can supply to the controller.
- Is displayed as a measured temperature.
- Press the SET button, and the display flashes the temperature.
- Press – to set the desired temperature.
- After setting press SET to confirm return.
- The controller automatically performs the relay by setting off.
- Lights, LED status descriptions.
- Indicator: Off The relay is switched off, Always indicate the relay is closed.
- LED: Shows LL is the sensor open, showing?HH is out of range, the thermostat will be forced to close the relay.
- The display–as high-temperature protection.
Programming:
- MENU: to enter the programming mode, press and hold the SET button for approx. 5 s
- Selection of mode P0 – P6 by means of + and – buttons
- Entry into the selected mode by pressing the SET button
- Confirmation of the selected value by pressing the SET button
Programming modes:
- P0: choice of cooling or heating, C/H
- P1: hysteresis setting, from 0.1°C to 15°C
- P2: upper temperature limit, 110 °C
- P3: Lower temperature limit, -50°C
- P4: Set temperature deviation, from -7°C to 7°C
- P5: Relay switching delay time, range 0 s to 10 s
- P6: Over temperature alarm, range 0°C to 110°C
Specifications:
| Specification | Value |
|---|---|
| Supply Voltage | 12V DC |
| Temperature Control Range | -50°C to +110°C |
| Display Type | 3-Digit Segment Display |
| Control Buttons | 3 |
| Temperature Resolution | 0.1°C (-9.9°C to +90°C), 1°C (Outside this range) |
| Output Load (DC) | 20A @ 14V DC |
| Output Load (AC) | 10A / 15A @ 250V AC |
| Temperature Sensor | Waterproof NTC 10K Probe |
| Probe Cable Length | 50 cm |


Reviews
There are no reviews yet.